
LG F4V310SNE Washing Machine Leaking Water When Filling
My lg F4V310SNE washing machine leaks water whenever it fills up. It stays mostly dry during the wash, but water always ends up on the floor when filling. What could be the problem?
Tools Required
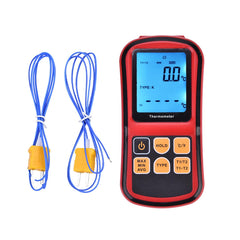
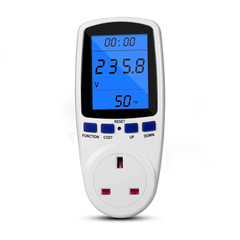
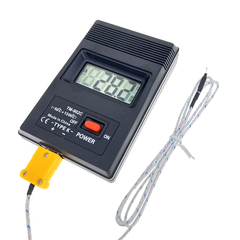

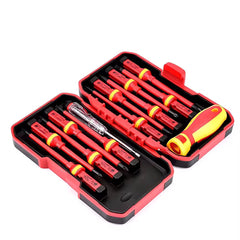

Hi Peter, thanks for your question regarding your LG F4V310SNE Washing Machine.
Yes, I've seen this before. I suggest you check the fill pipe from the soap door to the drum. Sometimes it rubs against the chassis. You can watch a video I made on dismantling a washing machine, and I'll list all the spare parts at the bottom of the page.
It's easy. First, remove the facial panel on the machine—you can see how in the video. Then, take off the front panel. This will give you clear access to the soap door hose. Next, remove the two clips, one on the soap door and one on the drum, and replace the seal.
A washing machine that leaks water during the fill cycle can be frustrating, but the good news is that this is often a straightforward repair. One of the most common culprits is a worn or damaged fill pipe—the hose that runs from the soap dispenser door to the drum. Over time, this pipe can rub against the chassis, causing cracks or splits that allow water to escape. If you've noticed water pooling beneath your machine or dripping from the front panel during the wash cycle, this is likely your problem.
Identifying the Issue
Before you start any repair work, it's worth confirming that the fill pipe is indeed the source of the leak. During a normal fill cycle, observe where the water is coming from. If it's dripping from around the soap dispenser area or from beneath the front panel, the fill pipe is a strong suspect. You may also notice that the leak is worse when the machine is filling at full speed, which is typical of a damaged hose.
What You'll Need
To complete this repair, you'll need a replacement fill pipe assembly (also called a soap door hose or inlet hose), a screwdriver set, and possibly a pair of pliers. The exact spare parts required will depend on your washing machine model, so check your manual or the manufacturer's website for the correct part number. We stock replacement fill pipes for most major appliance brands, and you can find the specific part for your model on our site.
Step-by-Step Repair Guide
Step 1: Disconnect the Machine
Before you begin any work, unplug your washing machine from the electrical outlet. This is essential for your safety. If your machine is connected to the water supply, turn off the water valves as well.
Step 2: Remove the Facial Panel
Most washing machines have a removable front panel or fascia. Look for screws or clips holding it in place—these are typically located at the bottom or sides of the panel. Carefully remove these fasteners and gently pull the panel away from the machine. If you're unsure about the exact location of these fasteners on your model, refer to the manufacturer's video guide or manual.
Step 3: Access the Front Panel
Once the facial panel is off, you'll have better access to the internal components. The front panel itself may also need to be removed to reach the fill pipe. This panel is usually held in place by several screws around the perimeter. Remove these screws and carefully lift the panel away, being mindful of any wiring or components attached to it.
Step 4: Locate and Inspect the Fill Pipe
With the front panel removed, you should now have a clear view of the fill pipe running from the soap dispenser door to the drum. Examine it closely for any visible cracks, splits, or areas where it may be rubbing against the chassis. If the damage is obvious, you've found your leak.
Step 5: Remove the Clips
The fill pipe is held in place by clips at both ends—one at the soap door and one at the drum. These clips are usually simple spring or plastic fasteners that can be released by hand or with a gentle pry from a screwdriver. Carefully remove both clips, supporting the hose as you do so to prevent it from falling.
Step 6: Remove the Old Fill Pipe
Once the clips are removed, gently pull the fill pipe away from both connection points. There may be a small amount of residual water in the hose, so have a cloth or towel ready to catch any drips.
Step 7: Install the Replacement Fill Pipe
Take your new fill pipe and align it with the connection points on the soap door and drum. Push it firmly onto both connections until you hear or feel a click, indicating a secure fit. Then, reinstall the two clips—one at the soap door and one at the drum—to hold the hose in place.
Step 8: Reassemble the Machine
Carefully reattach the front panel, ensuring all screws are tightened securely. Then, reattach the facial panel in the same manner. Double-check that all fasteners are tight and that no wires or components have been pinched during reassembly.
Step 9: Test the Repair
Reconnect the water supply and plug the machine back in. Run a short fill cycle without any clothes inside to check for leaks. Watch carefully around the soap dispenser area and beneath the machine. If no water is leaking, your repair is successful.
Prevention Tips
To avoid future fill pipe issues, ensure that your washing machine is installed on a level surface and that the hose is not kinked or bent sharply. Check the fill pipe periodically for signs of wear, and replace it proactively if you notice any cracks or discolouration, even if it's not actively leaking yet. This can save you from unexpected water damage down the line.
If you've completed this repair and the leak persists, the problem may lie elsewhere—such as with the soap dispenser seal itself or the inlet valve. In that case, we recommend consulting your machine's manual or contacting a professional technician.
Parts for This Model
Showing compatible parts for model f4v310sne