
Beko WX940430W Remove panel for dismantling
Your Youtube videos are awesome - do you have one that covers how to remove the front panel of the above, which does not have a kick panel or a hidden screw in the filter area? Regards Brian
Tools Required
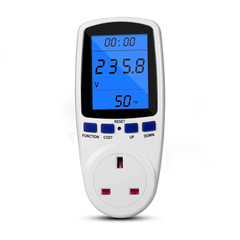
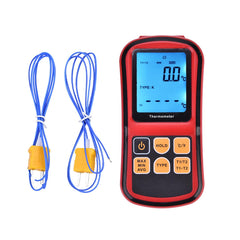

How to Strip Down the Beko WX940430W: A Complete Guide to Removing the Front Panel
Brian, when you are tackling the Beko WX940430W, getting to the internal components like the drum, heater, or motor means removing the entire front panel. Manufacturers often design these machines with overlapping parts, which can make a straightforward repair look intimidating and push people toward just buying a new machine.
However, once you understand the sequence, getting the front off is completely logical. In this guide, we are going to break down exactly how to strip this Beko machine down safely, explaining the mechanics behind every step so you know exactly what you are doing and why.
⚠️ Safety First
Before picking up a single tool, isolate the appliance.
-
Unplug the machine from the mains electricity.
-
Turn off the water supply valves.
-
Disconnect the inlet hoses and have a towel ready for residual water.
Tools Required
-
Torx or Phillips screwdrivers
-
Flathead screwdriver
-
Pliers
-
A shallow container or towel for water catch
This video will show you how a typical beko machine comes apart.
Step 1: Removing the Top Panel (The Lid)
You cannot take the front off the Beko WX940430W without first removing the top. The top panel secures the upper fascia and control board in place.
-
Locate the rear screws: Go to the back of the machine and remove the screws securing the top panel.
-
Release the panel: Pull the top panel firmly towards the back of the machine. It will unseat from its locking grooves.
-
Lift and set aside: Lift the panel off completely. This exposes the top counterweight and the back of the control fascia.
Step 2: Removing the Soap Dispenser and Control Fascia
The control panel (fascia) overlaps the main front panel. To get the front panel off, the fascia has to get out of the way.
-
Remove the dispenser drawer: Pull the soap drawer out until it stops. Press down on the locking tab (usually located right in the fabric softener compartment) and pull the drawer completely free.
-
Remove the drawer housing screws: Look inside the cavity where the drawer just was. You will find screws securing the fascia to the dispenser housing. Take these out.
-
Unclip the fascia: Remove any screws on the top edge (which you revealed in Step 1) holding the fascia down. Carefully release the plastic clips holding the fascia to the chassis.
-
Drape it out of the way: You do not need to disconnect all the wiring. Just gently fold the control panel up and rest it securely on top of the machine so it doesn't get damaged.
Step 3: Releasing the Door Seal (The Gasket)
The rubber door seal connects the floating tub to the stationary front panel. If you try to pull the front panel off without releasing this seal first, you will tear the rubber.
-
Remove the retaining band: Open the porthole door. Run your fingers along the outer lip of the rubber seal to find the wire retaining band and its tension spring.
-
Pry the spring: Insert your flathead screwdriver into the spring loop. Gently stretch it outward to lever the wire band completely off the lip of the front panel.
-
Tuck the seal: Peel the rubber lip off the metal front panel and push it right inside the drum. This successfully separates the tub from the front casing.
Step 4: Disconnecting the Door Interlock
The door lock mechanism is screwed into the front panel but wired directly into the machine's main harness.
-
Access the lock: Reach your hand behind the front panel through the gap where you just pushed the rubber seal.
-
Unscrew and release: Remove the two screws on the front of the panel holding the lock in place.
-
Push the lock back: Let the lock assembly drop back inside the machine. This ensures the front panel is completely free from the internal wiring.
Step 5: Removing the Kickplate (Plinth) and Drain Filter
The bottom screws for the front panel are hidden behind the plastic kickplate at the base of the machine.
-
Unclip the kickplate: Use your flathead screwdriver to gently pry the bottom plinth away from the machine.
-
Drain the residual water: This is crucial. Open the pump filter slightly to drain any stagnant water left in the system into your shallow tray, otherwise, it will end up all over your floor.
Step 6: Detaching the Front Panel
Now that the overlapping components (the fascia, the seal, the door lock, and the plinth) are out of the way, the front panel of the Beko WX940430W is fully isolated.
-
Remove the top screws: Locate the screws at the top corners of the front panel (these were hiding behind the control fascia).
-
Remove the bottom screws: Locate the screws at the bottom corners of the front panel (these were hiding behind the kickplate).
-
Lift and detach: Grab the front panel by the top and bottom edges. Tilt it slightly forward and lift it upward off its lower mounting pegs.
Place the panel safely out of the way. Brian, you now have completely unrestricted access to the front counterweights, the heater, the motor, and the shock absorbers, ready to get this machine working again.
I've also added some useful tools that will assist you and embedded a video for you.
Service Documents
Parts for This Model
Showing compatible parts for model WX940430W